 These little witches’ hats can be filled with treats to give away to neighbourhood trick-or-treaters, or handed out as Halloween party favours for grown-up friends. They are also cute as table or tree decorations.
The same design can be scaled up to make party hats to wear, or make them out of foam and cover with fabric for a real witch’s hat.
Keep the hats ready again for the December holidays when Harry Potter and the Goblet of Fire comes to cinemas.
Use heavy craft paper or cardboard to make the hats. You can either use black paper, or paint the sheets black on both sides when you’ve cut the circles. The hats are suitable for children to make, but younger children should be supervised or assisted with using a craft knife and fitting the base to the cone.
To make the hats
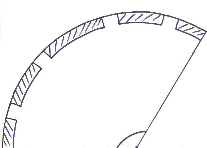
Draw a semi-circle against the edge of your sheet of heavy craft paper or cardboard, using a compass or circular template.
 Measure approximately a 120 degree angle from the centre of the straight edge of your semi-circle, and draw a radius through 120 degrees. You can use a protractor to get the angle correct, but guessing slightly either side of 120 degrees will work fine, or, if you have a big enough sheet, you can simply draw a circle and divide it into thirds.
Cut out the bigger wedge and shape it into the cone of the witch’s hat. Glue or staple into place.
Reset your compass to half the length of the radius of the semi-circle used to form the cone. Draw a full circle and cut out. This is the base of the hat.
Candy holders
Cut about four tabs into the bottom of the hat cone, removing the paper between each tab.
Position the cone in the centre of the base circle and mark the positions and lengths of the tabs.
Use a craft knife to cut slits in the base circle to fit the tabs into.
Put a selection of candy in the cone and slot the base through the tabs of the cone to close the hat. Bend the tabs over to hold the base in place.
As a final touch, bend the tip of the cone of the hat in two places in opposite directions so that it looks slightly battered.
Paper/card hats to wear
Experiment with the sizing of the cone, starting bigger and cutting your wedge smaller until it fits the adult or child’s head you’re using as a model.
Draw around the base of the hat onto another sheet of card. Draw a bigger circle around the first. Cut around the bigger circle, then cut the centre out using a craft knife, forming a doughnut as the base of the hat.
Fit the cone into the doughnut hole. If the cone doesn’t fit snugly, cut approximately 1cm deep lines vertically into the bottom of the base. Bend every second tab up and fit the cone into the base. Glue each tab alternately to the top and bottom of the base to secure.
Wizards’ hats and medieval ladies’ hats
The Harry Potter movies have made witch-style hats popular for both girls and boys, but you can still offer the boys a wizard’s hat as a variation. These are made only of the cone of the hat without a base and are purple or blue instead of black. Stick gold or silver stars on them.
Medieval ladies’ hats also use only the cone in pastel colours, together with a piece of chiffon glued to the tip.
Fabric hats
 Use a correctly sized cardboard hat as a template to cut the required shapes from a thin sheet of foam, sponge, or coloured felt.
Mould the tip of the cone out of wire mesh and position over the tip of the foam hat. The wire will allow you to form a bent, battered cone to give an authentic look to your hat.
Cover the hat with fabric either glued or stapled onto the hat.
If you've used felt for the hats, sew the wire mesh into the inside of the cone - dark coloured felt hats won't necessarily require covering with fabric.
This article was first published on BellaOnline in October 2006 and also features on Squidoo. © Elsa Neal
Recommended books for more Halloween projects:
Hocus Pocus Halloween Crafts compiled by Dawn Anderson
Halloween Crafts : Eerily Elegant Decor by Kasey Rogers and Mark Wood

